
Installing Docker is very easy. Whether on any desktop environment(like Windows, Linux, or macOS) or on a server environment, then installation is simple.
Here we are discussing the installation of docker on desktops and servers. We are discussing the installation process to the point so that you don’t have to go through a long document for the installation.
Docker Desktop
For using Docker in a desktop environment, there is “Docker Desktop” available. This is provided by Docker inc.
Docker Desktop on Windows
On our Windows system, we are using the WSL(Windows Sub-System for Linux) for installing and using Docker.
After installation start the Docker Desktop application. It will look like the one below(we have a few containers running here).
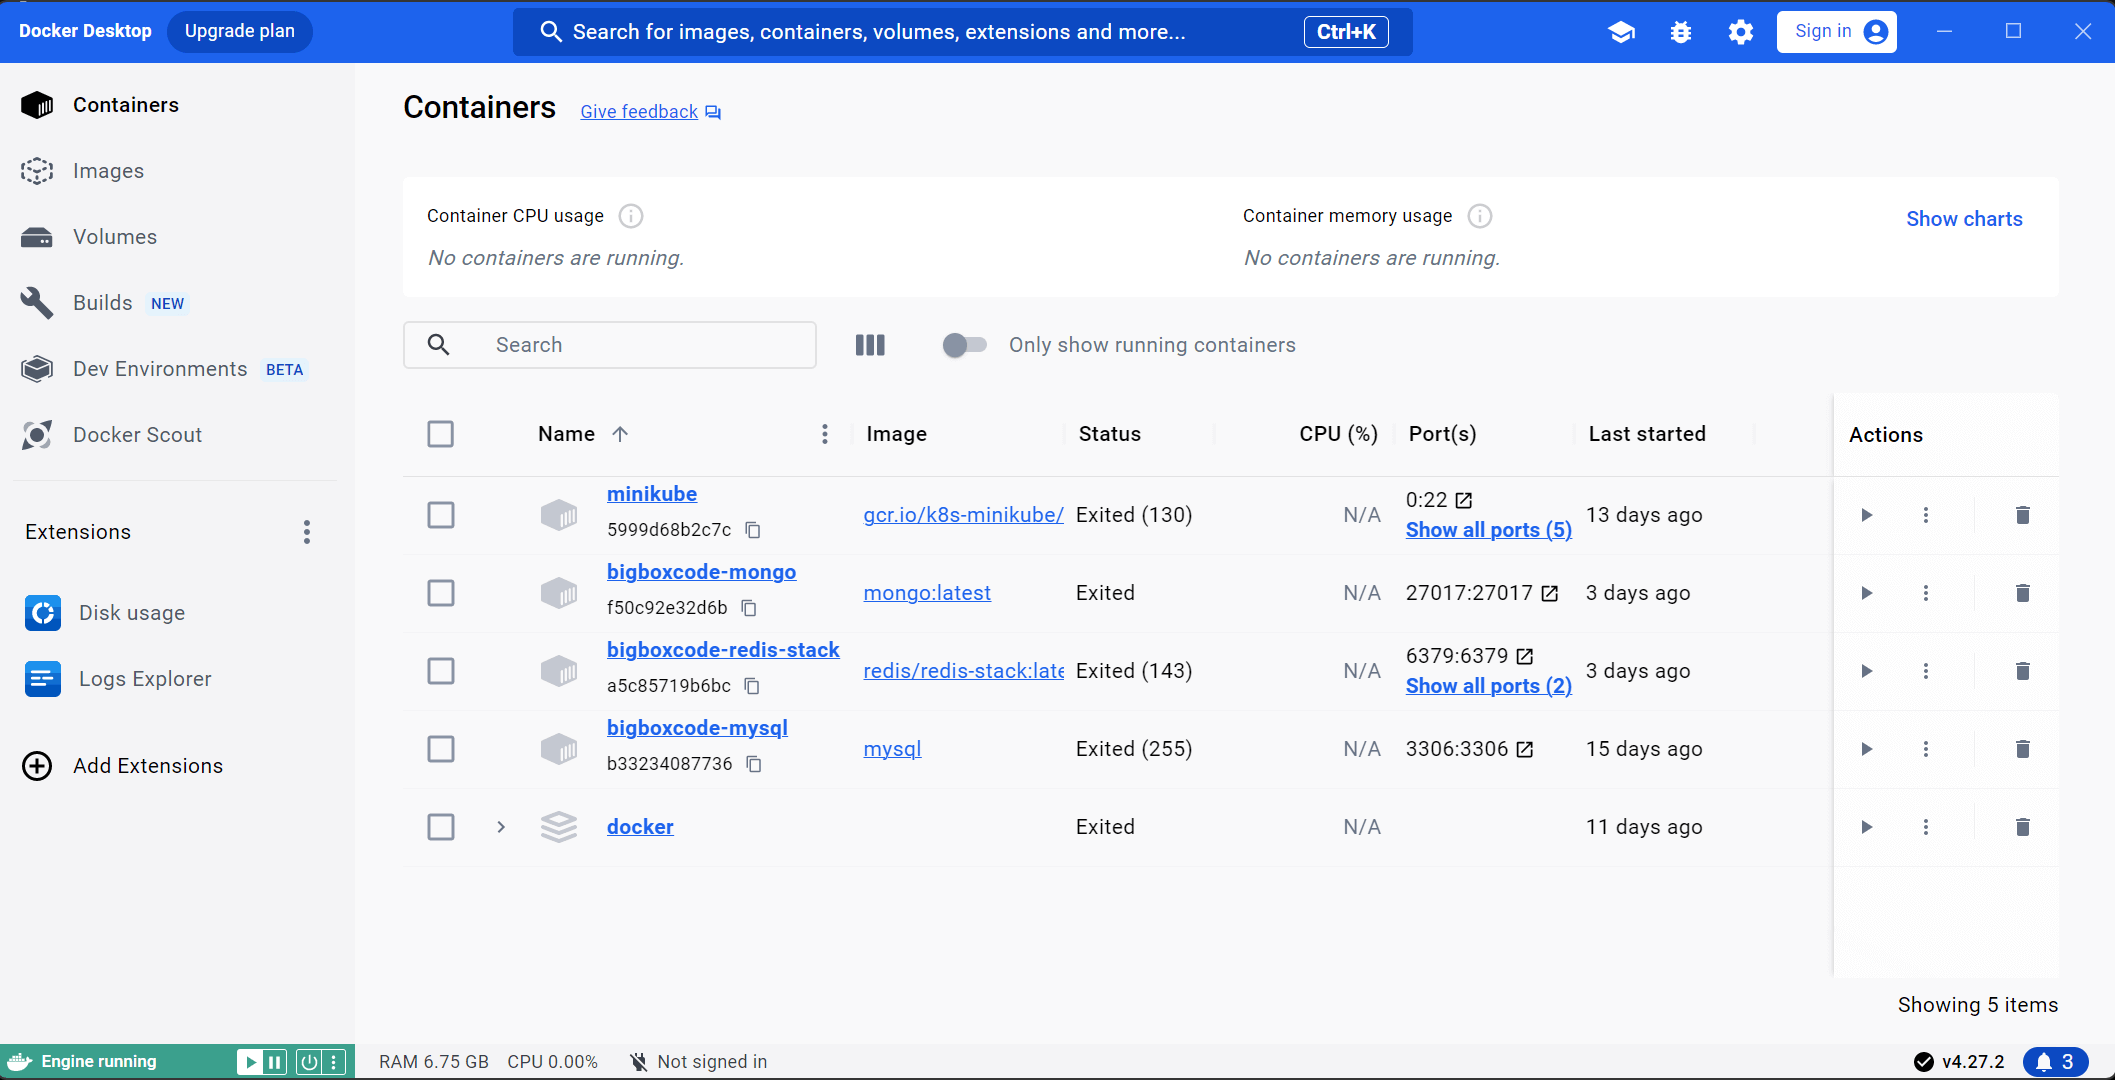
![]() NOTES
NOTES
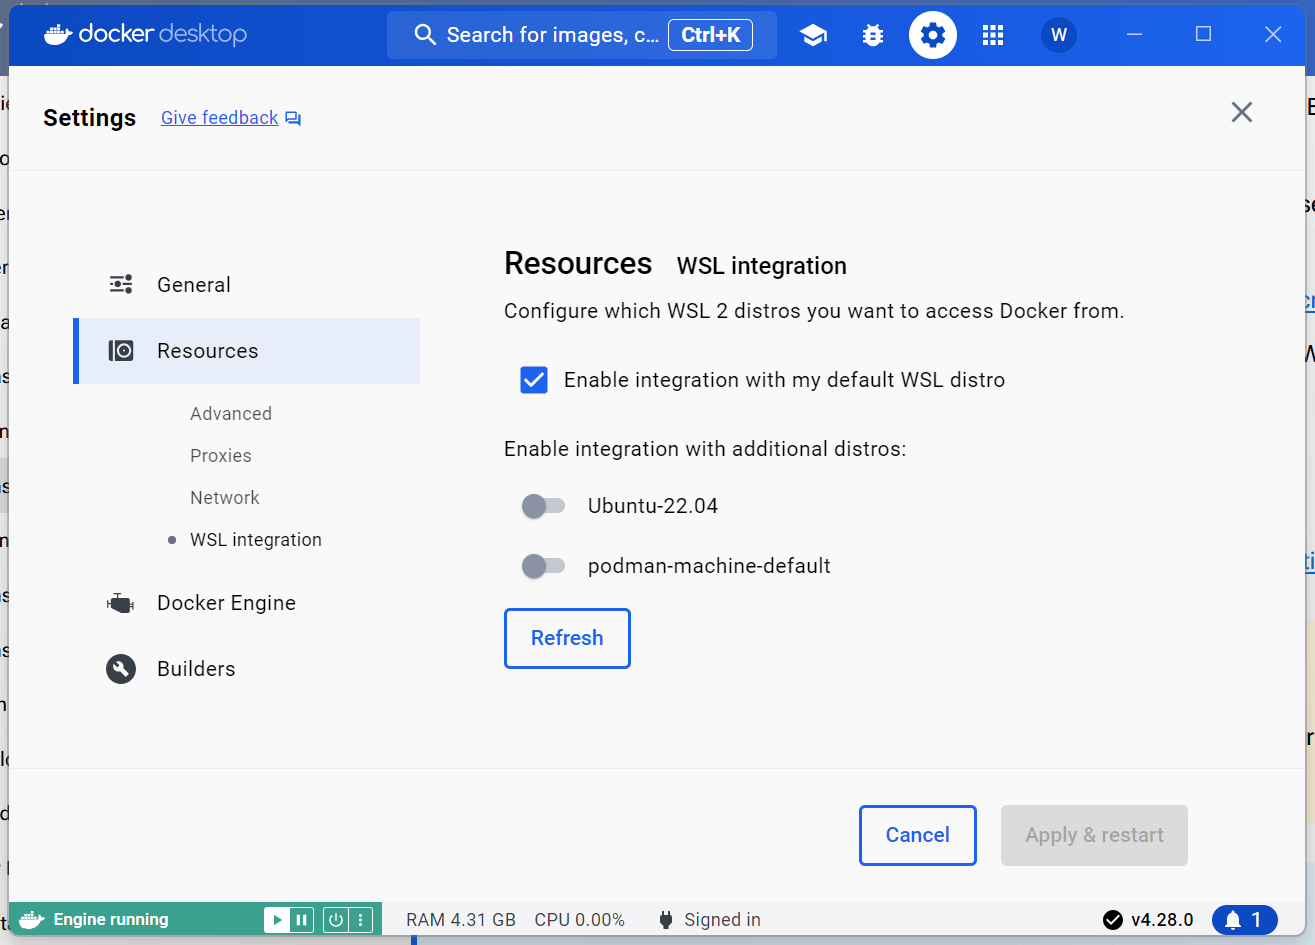
One important setting, that we should enable after installing the Docker Desktop on Windows is the “WSL integration“.
Go to the Settings > Resources > WSL integration
and check the “Enable integration with my default WSL distro“.
This will enable us to use the same docker system from the Linux Sub-system on Windows.
Docker Desktop on Linux
Docker Desktop on macOS
Docker Engine on Linux(Ubuntu) Server
Use the following steps to manage docker engine installation and management on your Ubuntu server-
Install Docker Engine on Linux(Ubuntu) Server
Let’s install the Docker engine on our Ubuntu server-
Step #1: Download the GPG key
Use the following command-
sudo apt-get update
sudo apt-get install ca-certificates curl
sudo install -m 0755 -d /etc/apt/keyrings
sudo curl -fsSL https://download.docker.com/linux/ubuntu/gpg -o /etc/apt/keyrings/docker.asc
sudo chmod a+r /etc/apt/keyrings/docker.ascHere are what the above commands do-
Step #2: Add Docker repository
Use the following command to add the docker repository to the Apt source list-
# Add the repository to Apt sources:
echo \
  "deb [arch=$(dpkg --print-architecture) signed-by=/etc/apt/keyrings/docker.asc] https://download.docker.com/linux/ubuntu \
  $(. /etc/os-release && echo "$VERSION_CODENAME") stable" | \
sudo tee /etc/apt/sources.list.d/docker.list > /dev/nullStep #3: Update Ubuntu package index
Update Ubuntu package indexes-
sudo apt-get updateStep #4: Install Docker and related packages
Use the following command to install docker and related packages-
sudo apt install docker-ce docker-ce-cli containerd.io docker-buildx-plugin docker-compose-pluginHere are the purposes of the above packages-
Step #5: Check docker
Check if docker is installed properly or not, by ckecking the docker version-
bigboxcode@ubuntu-server-1:~$ sudo docker version

Client: Docker Engine - Community
 Version:           25.0.3
 API version:       1.44
 Go version:        go1.21.6
 Git commit:        4debf41
 Built:             Tue Feb  6 21:13:09 2024
 OS/Arch:           linux/amd64
 Context:           default

Server: Docker Engine - Community
 Engine:
  Version:          25.0.3
  API version:      1.44 (minimum version 1.24)
  Go version:       go1.21.6
  Git commit:       f417435
  Built:            Tue Feb  6 21:13:09 2024
  OS/Arch:          linux/amd64
  Experimental:     false
 containerd:
  Version:          1.6.28
  GitCommit:        ae07eda36dd25f8a1b98dfbf587313b99c0190bb
 runc:
  Version:          1.1.12
  GitCommit:        v1.1.12-0-g51d5e94
 docker-init:
  Version:          0.19.0
GitCommit: de40ad0Check information of the docker installation-
bigboxcode@ubuntu-server-1:~$ sudo docker info

Client: Docker Engine - Community
 Version:    25.0.3
 Context:    default
 Debug Mode: false
 Plugins:
  buildx: Docker Buildx (Docker Inc.)
    Version:  v0.12.1
    Path:     /usr/libexec/docker/cli-plugins/docker-buildx
  compose: Docker Compose (Docker Inc.)
    Version:  v2.24.6
    Path:     /usr/libexec/docker/cli-plugins/docker-compose

Server:
 Containers: 1
  Running: 0
  Paused: 0
  Stopped: 1
 Images: 1
 Server Version: 25.0.3
 Storage Driver: overlay2
  Backing Filesystem: extfs
  Supports d_type: true
  Using metacopy: false
  Native Overlay Diff: true
  userxattr: false
 Logging Driver: json-file
 Cgroup Driver: systemd
 Cgroup Version: 2
 Plugins:
  Volume: local
  Network: bridge host ipvlan macvlan null overlay
  Log: awslogs fluentd gcplogs gelf journald json-file local splunk syslog
 Swarm: inactive
 Runtimes: io.containerd.runc.v2 runc
 Default Runtime: runc
 Init Binary: docker-init
 containerd version: ae07eda36dd25f8a1b98dfbf587313b99c0190bb
 runc version: v1.1.12-0-g51d5e94
 init version: de40ad0
 Security Options:
  apparmor
  seccomp
   Profile: builtin
  cgroupns
 Kernel Version: 5.15.0-97-generic
 Operating System: Ubuntu 22.04.4 LTS
 OSType: linux
 Architecture: x86_64
 CPUs: 4
 Total Memory: 1.917GiB
 Name: ubuntu-server-1
 ID: a78a1bfe-65a1-43eb-8d1f-98c8809b88be
 Docker Root Dir: /var/lib/docker
 Debug Mode: false
 Experimental: false
 Insecure Registries:
  127.0.0.0/8
Live Restore Enabled: falseUninstall Docker Engine from Linux(Ubuntu) Server
Use the following command to remove the Docker engine and related packages from your Ubuntu server-
sudo apt purge docker-ce docker-ce-cli containerd.io docker-buildx-plugin docker-compose-plugin docker-ce-rootless-extras