
Here we are discussing the implementation of Server-Server Events(SSE) using Python, specifically using the Flask framework.
More details about SSE including all headers and options are discussed in a separate article, check that to know the subject in detail (Server-Sent Events (SSE)).
JS web client and EventSource options and complete usage are discussed in a separate article in detail (JS EventSource SSE Web Client).
To implement the SSE using the Flask framework, use the following steps. We are discussing 2 ways to implement SSE in Flask:
Method #1: Using Flask Features
In this method, we are going to implement SSE using the Flask framework features. No additional package will be used in this method.
Let’s discuss step-by-step.
Step #1: Simplest Flask SSE Implementation
Make sure you have python and pip installed on your machine. Create a new directory for the project. In the terminal go to that directory.
Install Flask package, using:
pip install flaskCreate a python file in the directory, name it flask_sse.py. Add the following lines of code to the file.
# flask_sse.py

from flask import Flask, Response
import time

app = Flask(__name__)

@app.route("/sse", methods=["GET"])
def sse():
    def sse_events():
        # We are using a counter here for sending some value in the response
        counter = 0

        while True:
            # In real world applications here we will fetch some data

            # Remember to yield to continue to sending data
            yield "data: message counter - {}\n\n".format(counter)

            # Increase the counter for the next message
            counter += 1
            # Put a sleep for 2 second
            time.sleep(2)

    # Send back response
    return Response(sse_events(), mimetype="text/event-stream")
So, what is going on here?
- This is a simple Flask application with endpoint /sse, which supports the GET method.
- Inside the sse method, we have created a new method named sse_events. And while returning the response, we are calling this method (which has yield in it).
- mimetype of the response is set to “text/event-stream“. This is important and we need to make sure to use it in the response.
- In the sse_events() method, we are using a while loop and in the while loop we are using yield to send the response. (in this implementation it is returning a dummy response, just for testing purpose).
- Also, there is a 2-second sleep in the loop.
Run Flask application using the following command.
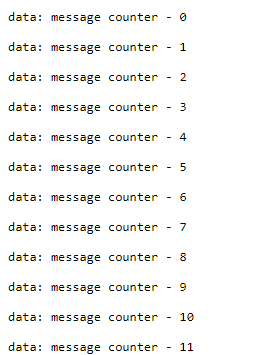
flask --app flask_sse runThis will run the application on port 5000. So, open http://localhost:5000/sse in your browser, and you will see some output. After every 2 seconds a new line will be added to that.
Chrome will show some output like below. (other browser may behave differently).
Or you can use curl to check the endpoint:
curl -N -H "Accept:text/event-stream" http://localhost:5000/sseIf you get a response, it means we are good, our Flask application is running and giving event-stream output.
Let’s go to the next step.
Step #2: Fetch and Send Real Data
Let’s fetch data from a real data source. The source can be a database, file, 3rd party API etc.
We will be using Redis as a data source here. So let’s run a Redis container in docker first. Run the following command for running the Redis container in Docker.
If you already have Redis running or you want to run Redis in any other way then skip this command.
docker run --name flask-sse-redis -p 6379:6379 -d redisThis will run a Redis container and expose it on port 6379.
Let’s install the Python package for Redis.
pip install redisAdditionally to resolve the cross-origin related issues install flask-cors package. This is not required for the SSE implementation but to allow clients to connect to the backend endpoint from anywhere. Use the following command.
pip install flask-corsUpdate the flask_sse.py file with the following code.
# flask_sse.py

from flask import Flask, Response
from flask_cors import CORS
import time
import redis

app = Flask(__name__)

# For resolving cross origin issue
CORS(app)

# Configure Redis
r = redis.Redis(
    host='localhost',
    port=6379,
)

@app.route('/sse', methods=["GET"])
def sse():
    def sse_events():

        # Use a vairable to keep track of the value change
        # So that we can send update only when value is changed
        old_value = None

        while True:

            # Fetch value from redis for key 'current_price'
            price = r.get('current_price')

            # send update only when price is changed
            if old_value != price:
                yield "data: Current Price - {}\n\n".format(int(price))

                old_value = price

            time.sleep(2)

    return Response(sse_events(), mimetype="text/event-stream")
What is going on here?
- We connected to the Redis instance in our python code.
- In the while loop we are fetching the value of current_price from Redis and sending it in the event-stream response.
- We are also keeping track of the value, so that the response is sent only when the value is changed. If the value is not changed from the last time, then we are not sending anything in the response.
Run the application again, using the following command:
flask --app flask_sse runGet into the redis-cli of the docker container and update the current_price, use the following command for that
# This following line will take you to shell inside redis container and you will access access Redis CLI
docker exec -it flask-sse-redis redis-cli

# After getting into the Redis CLI use SET command to set value of current_price
SET current_price 100

# Change the value of current_price
SET current_price 102
Python code should get the updates now.
To check the updates, let’s create a simple HTML file and add the following code.
<html>
<head>
  <title>Flask SSE Demo</title>
</head>

<body>
  <ul id="list">
    <!-- new content appears here -->
  </ul>
</body>

<script>
  const eventSource = new EventSource('http://localhost:5000/sse');
  const listElement = document.getElementById('list');

  eventSource.onmessage = function (currentEvent) {
    if (currentEvent.data.length > 0) {
      const listElement = document.getElementById('list');
      const newElement = document.createElement('li');
      newElement.innerText = currentEvent.data;

      listElement.appendChild(newElement)
    }
  };
</script>

</html>
To know more about this EventSource implementation check the detailed article: Web (JS EventSource) Client.
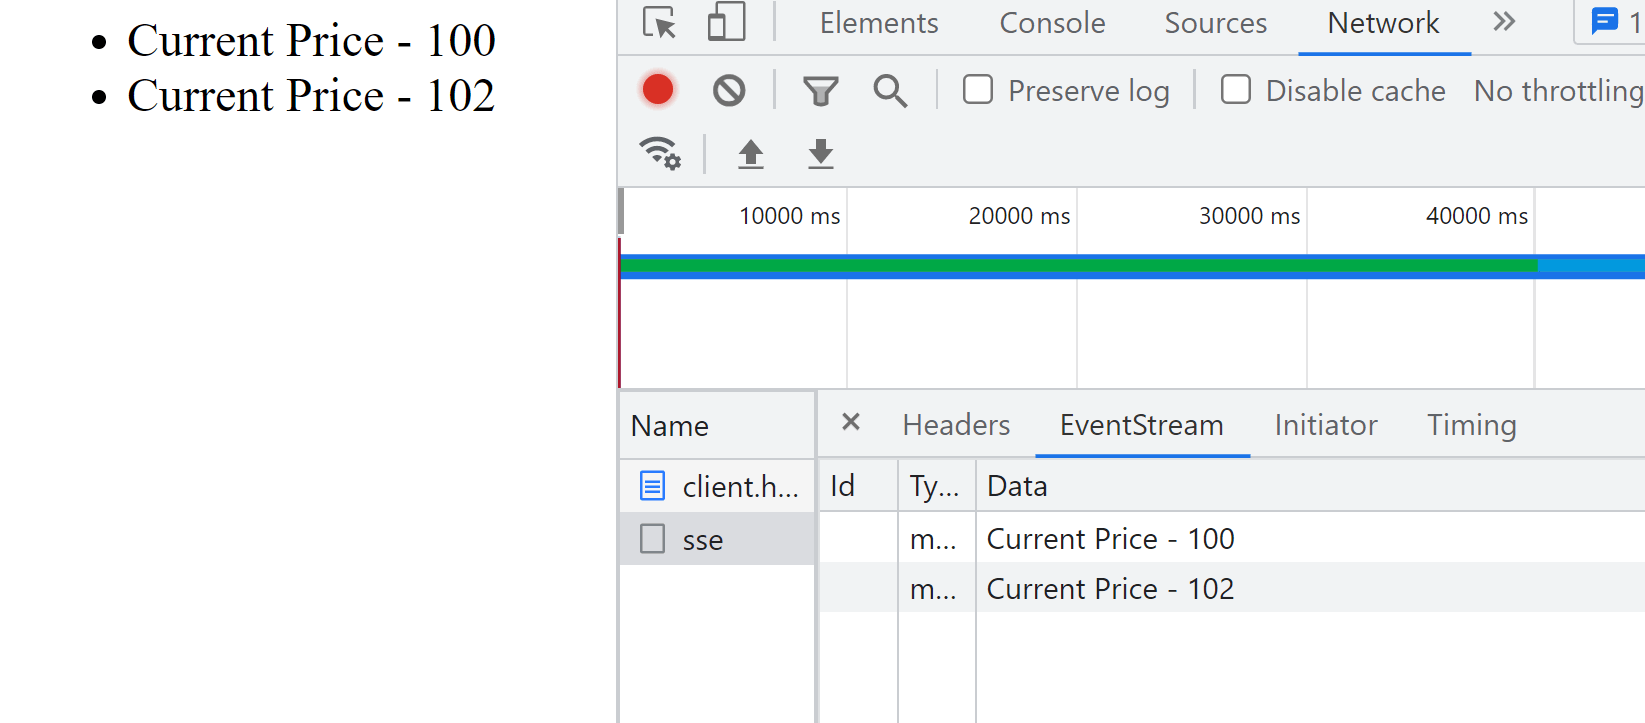
Open the HTML file in the browser, and then change the ‘current_price‘ value in Redis. You will see something like this below.
Step #3: Implement Pub/Sub
In the script above, we are using a while loop to periodically fetch data from the database and send responses. If the system does not have much change in data then most of the database calls will not send any data.
In a real application, we might use Pub/Sub for this type of application. Let’s test this with Pub/Sub using Redis.
Implement Publisher:
Code for publisher endpoint will be like below. It will accept a POST request and the endpoint will be /publish.
@app.route('/publish', methods=["POST"])
def publish():
    try:
        # Get data from request and parse it
        data = json.loads(request.data)

        # Send to Redis publisher
        r.publish("bigboxcode", json.dumps(data))

        return jsonify(status="success", message="published", data=data)
    except:
        return jsonify(status="fail", message="not published")
Implement Subscriber:
Code for subscriber will be as below. It will accept a GET request and endpoint will be /sse.
@app.route('/sse', methods=["GET"])
def sse():
    def sse_events():
        # Initiate Redis pub/sub
        pubsub = r.pubsub()
        # Subscribe to channel "bigboxcode"
        pubsub.subscribe("bigboxcode")

        # Listen to message and perform action when a new message arrives
        for message in pubsub.listen():
            try:
                data = message["data"]

                yield "data: {}\n\n".format(str(data, 'utf-8'))
            except:
                pass

    return Response(sse_events(), mimetype="text/event-stream")
Full Code for Pub/Sub:
Full code for the Pub/Sub implementation in Flask with Redis Pub/Sub will be as below:
# flask_sse.py

from flask import Flask, Response, jsonify, json, request
from flask_cors import CORS
import time
import redis

app = Flask(__name__)
CORS(app)
r = redis.Redis(
    host='localhost',
    port=6379,
)

@app.route('/publish', methods=["POST"])
def publish():
    try:
        # Get data from request and parse it
        data = json.loads(request.data)

        # Send to Redis publisher
        r.publish("bigboxcode", json.dumps(data))

        return jsonify(status="success", message="published", data=data)
    except:
        return jsonify(status="fail", message="not published")

@app.route('/sse', methods=["GET"])
def sse():
    def sse_events():
        # Initiate Redis pub/sub
        pubsub = r.pubsub()
        # Subscribe to channel "bigboxcode"
        pubsub.subscribe("bigboxcode")

        # Listen to message and perform action when a new message arrives
        for message in pubsub.listen():
            try:
                data = message["data"]

                yield "data: {}\n\n".format(str(data, 'utf-8'))
            except:
                pass

    return Response(sse_events(), mimetype="text/event-stream")
Run this on port 5000 using the following command:
flask --app flask_sse --debug run --port=5000Now 2 endpoints will be available:
- /publish: for publishing and sending data for subscription
- /sse: for subscribing and getting the request
Use the following HTML file to check SSE on the frontend.
<html>
<head>
  <title>Flask SSE Demo</title>
</head>

<body>
  <ul id="list">
    <!-- new content appears here -->
  </ul>
</body>

<script>
  const eventSource = new EventSource('http://localhost:5000/sse');
  const listElement = document.getElementById('list');

  eventSource.onmessage = function (currentEvent) {
    if (currentEvent.data.length > 0) {
      const listElement = document.getElementById('list');
      const newElement = document.createElement('li');
      newElement.innerText = currentEvent.data;

      console.log(JSON.parse(currentEvent.data))

      listElement.appendChild(newElement)
    }
  };
</script>

</html>
Save this in an HTML file and open it in the browser.
Let’s send a request to the publisher. Use postman to send a request.
Send data using Postman:
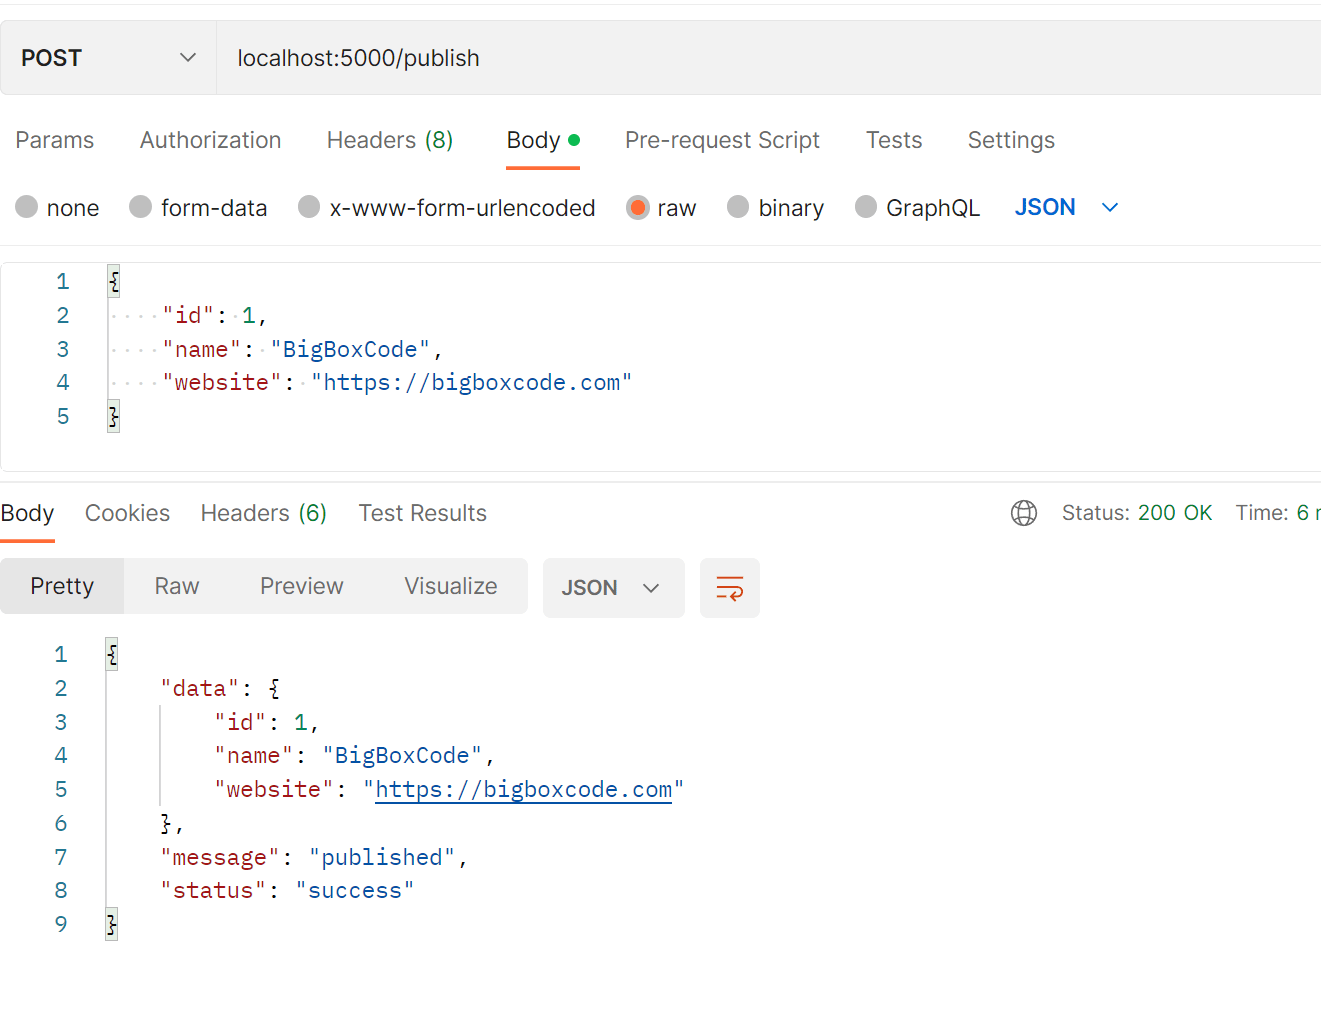
Open postman or any other client to send the POST request to http://localhost:5000/publish. Send any JSON data in the body, like below:
{
    "id": 1,
    "name": "BigBoxCode",
    "website": "https://bigboxcode.com"
}
Send data using CURL:
Use the following command to send the POST request to http://localhost:5000/publish for a new message/event using CURL.
curl --location --request POST 'http://localhost:5000/publish' \
--header 'Content-Type: application/json' \
--data-raw '{
    "id": 1,
    "name": "BigBoxCode",
    "website": "https://bigboxcode.com"
}'
Check Result
You should see output like below. Additionally, check your browser network tab for the SSE data. Check the EventStream tab there for the request.

Also, check the console and you should see the data in JSON format.

Method #2: Using Flask-SSE Package
We are using the package Flask-SSE here. You can check the package documentation at: https://flask-sse.readthedocs.io/en/latest/index.html and package details here: https://pypi.org/project/Flask-SSE/
Install required packages:
pip install flask-sse gunicorn geventCreate a file named sse_app.py and add the following lines of code:
# sse_app.py

from flask import Flask, render_template, json, jsonify, request
from flask_sse import sse

app = Flask(__name__)
app.config["REDIS_URL"] = "redis://localhost:6379"
app.register_blueprint(sse, url_prefix='/stream')

@app.route('/')
def index():
    return render_template("index.html")

@app.route('/publish', methods=["POST"])
def publish():
    try:
        # Get data from request and parse it
        data = json.loads(request.data)

        # Send to Redis publisher
        sse.publish(data, type="bigboxcode")

        return jsonify(status="success", message="published", data=data)
    except:
        return jsonify(status="fail", message="not published")
Create the template file that is required for the rendering. Create templates/index.html and add the following lines:
<!DOCTYPE html>
<html>

<head>
  <title>Flask-SSE Demo - BigBoxCode</title>
</head>

<body>
  <h3>Messages will appear below :-</h3>
  <ul id="list">
    <!-- new content appears here -->
  </ul>
</body>

<script>
  const source = new EventSource("{{ url_for('sse.stream') }}");

  source.addEventListener('bigboxcode', function (currentEvent) {
    if (currentEvent.data.length > 0) {
      const listElement = document.getElementById('list');
      const newElement = document.createElement('li');
      newElement.innerText = currentEvent.data;

      listElement.appendChild(newElement);

      console.log(JSON.parse(event.data));
    }
  }, false);

  source.addEventListener('error', function (currentEvent) {
    console.log(currentEvent)
  }, false);
</script>

</html>
Use the following command to run the application:
gunicorn sse_app:app --worker-class gevent --bind 127.0.0.1:8000This will run the application port 8000. the following endpoints are available.
- / (root): the root endpoint, which will return the HTML for checking the output.
- /publish [POST]: endpoint for accepting new messages for publishing.
- /stream: endpoint for getting the SSE response.
Open http://localhost:8000 in the browser. some default messages should show.
Send data:
Then send a post request to http://localhost:8000/publish like the below:

Check Output:
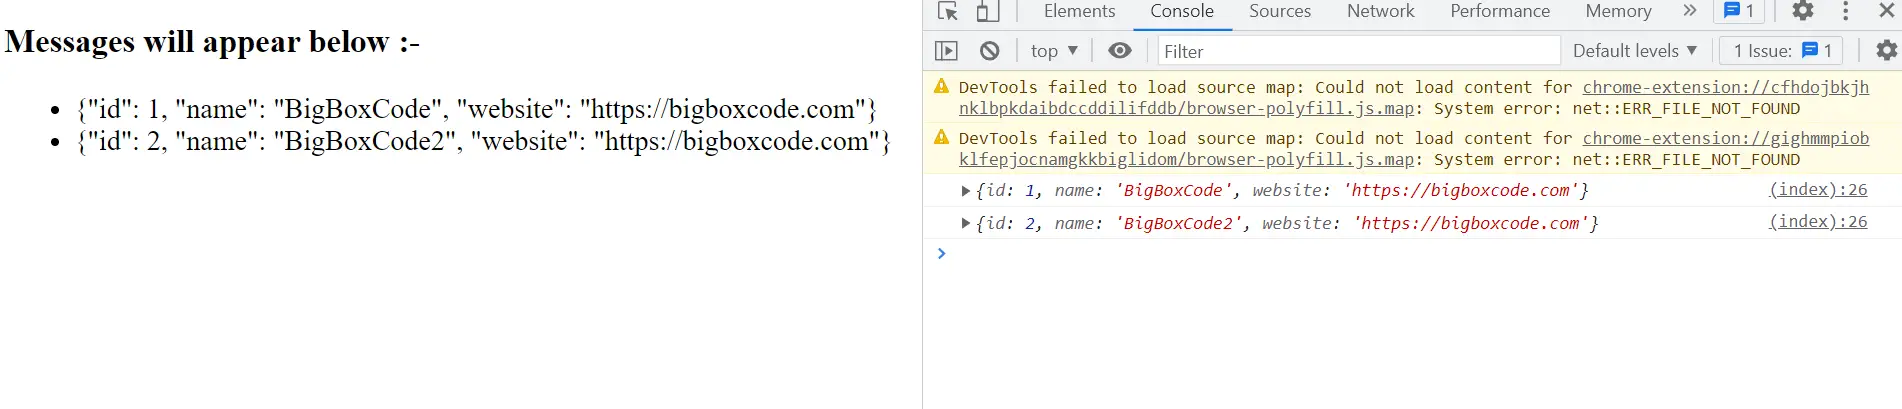
After sending requests like above, you should see the output in your browser, like the below:

Check the console for the JSON data, which was received:
Source Code
All source codes are available in the git repository, follow the link below: