
In this article, we are discussing different installation methods/processes of Redis.
First, we are discussing the installation of Redis using Docker. This will work on major operating systems, as docker is available in all common OS.
Then we are discussing the installation process on specific operating systems – Linux (Ubuntu), MacOS, and Windows.
Run Redis on Docker
![]() Make sure you have Docker installed on the machine.
Make sure you have Docker installed on the machine.
![]() Check the official Redis image details on the dockerhub at – https://hub.docker.com/_/redis
Check the official Redis image details on the dockerhub at – https://hub.docker.com/_/redis
Use the following command to run a Redis docker container –
Run Redis Container
docker run --name bigboxcode-redis -p 6379:6379 -d redisLet’s see what the provided options mean for “docker run” –
| Argument | Description |
|---|---|
| –name bigboxcode-redis | This means the name of the container created will be “bigboxcode-redis”. You can use any name here according to your application name or project name. |
| -p 6379:6379 | This means the port of Redis container 6379 will be exposed to the host machine port 6379. So the Redis instance inside the container can be accessed from the host machine through port 6379. If port 6379 on your host machine is already in use, then you can export to any other port on the host machine, for example, if you want to expose on host machine port 6380 then the option will be “-p 6380:6379”. Then the container port will be always the same “6379” as Redis is running on that port of the container in any case. |
| -d | This runs the container in detached mode, the terminal will not be occupied by the output of the container. Instead, the terminal will be released as soon as the container installation is complete. Redis container will be running in the background. |
| redis | The “redis” string specifies the image name(and tag). So in this case “redis” image will be pulled from the docker repository, and the tag/version will be “latest” (as the tag was not defined, so default tag “latest” will be used). This command will install “redis:latest”. If we want to install a specific version (say 6.2), then we can specify that like “redis:6.2“. |
On success, this will generate output like the below:
Unable to find image 'redis:latest' locally
latest: Pulling from library/redis
7bg38yjtcy7y: Pull complete
u2h8q9nt6px9: Pull complete
44zq8ecpjebn: Pull complete
v4w4gapn5p2v: Pull complete
ztzamg9e76xe: Pull complete
cpd87475pff4: Pull complete
Digest: sha256:g26v8kem5w53cmtdqhbmjpzfmpw5rq4zunce8r526p64htn3ebg93nag8e4jfm2z
Status: Downloaded newer image for redis:latest
hk2r842k78rk3z5bcem98r3q6jt7t8m9d744y3d496e4k2rr6yp5b7q3g5x5zgcrCheck Redis Container
To check if the container is running use the command –
# To check the running docker containers
docker ps

# To check all container including the stopped ones
docker ps -aThe output will be something like below-

Connect to redis-cli
To connect to and use the Redis client of the docker container, use the following command:
docker exec -it bigboxcode-redis redis-cliThis will get you into the CLI inside the docker container. Then you can interact with the Redis server, like you can send “ping” and get “PONG” back from Redis.
# After connection it will look like below
127.0.0.1:6379>

# Then we can enter command ("ping" in this case)
127.0.0.1:6379> ping
PONG![]() Type “exit” (or “quit“) and then press enter if you want to get out of the redis-cli
Type “exit” (or “quit“) and then press enter if you want to get out of the redis-cli
Redis Container Start/Stop
To stop the container we can use the following command
docker stop bigboxcode-redisOnce the docker container setup is complete, from the next time we can run the container using-
docker start bigboxcode-redisRun Redis Container with Config File
If you want to use your custom redis.conf file for some custom configuration, then use the following command
docker run --name bigboxcode-redis -v /your_redis_conf_file_dir:/usr/local/etc/redis -p 6379:6379 -d redis redis-server /usr/local/etc/redis/redis.confSo, what is going on here? Let’s check the meaning of the passed arguments for “docker run”-
| Argument | Description |
|---|---|
| –name bigboxcode-redis | This is the name of the container as we have already discussed above. Here the name of the container is “bigboxcode-redis“. |
| -v /your_redis_conf_file_dir:/usr/local/etc/redis | The “-v” flag is for passing the volume to bind. Here we have our “redis.conf” file in our host machine director “/your_redis_conf_file_dir“, and we are mounting/binding the directory to the docker container directory “/usr/local/etc/redis“. When the container starts running, then all the files will be available from our specified host machine directory to the container directory, so the “redis.conf” file will be available at “/usr/local/etc/redis” of the container. |
| -p 6379:6379 | This means we want the container port 6379 to be exposed to the host port 6379. |
| -d | This means we want to run the container in detached mode. So the terminal will stop showing output/log after the container starts. |
| redis | This is the image name. We can also specify the tag if we what to, like redis:tag. |
| redis-server /usr/local/etc/redis/redis.conf | Start the redis-server, and use the config file from /usr/local/etc/redis/redis.conf (which we have provided) |
Dockerfile for Redis
If you want to start the container using a Dockerfile then put the following content in the file-
FROM redis


# Use this line only if you want to use your own redis.conf file, ignore following command otherwise
# In case you want use this line, then make sure the "redis.conf" file present in the directory
COPY redis.conf /usr/local/etc/redis/redis.conf

# Start redis server and pass the config file provide by us
CMD [ "redis-server", "/usr/local/etc/redis/redis.conf" ]

# If you don't want to use your own redis.conf file then remove the line above and use(uncomment) the following line
# CMD[ "redis-server" ]Use the command below to build the image from the above Dockerfile-
docker build –t bigboxcode-redis:1.0 .Here are the args passed for the “docker build” command-
| Argument | Description |
|---|---|
| –t | This is used to pass the tag. The part that comes after this is the tag. |
| bigboxcode-redis | This is the image name |
| 1.0 | The tag name (this can be anything according to the specification). we have set it to 1.0 as this is our first version. |
| . | The dot(.) at the end specifies the context. Here the context is the current directory. |
Install Redis on Ubuntu(Linux)
Use the following commands to install Redis on Ubuntu-
# Download and save GPG key of Redis
curl -fsSL https://packages.redis.io/gpg | sudo gpg --dearmor -o /usr/share/keyrings/redis-archive-keyring.gpg

# Include Redis repo to the package source list
echo "deb [signed-by=/usr/share/keyrings/redis-archive-keyring.gpg] https://packages.redis.io/deb $(lsb_release -cs) main" | sudo tee /etc/apt/sources.list.d/redis.list

sudo apt-get update
sudo apt-get install redis![]() If you are running any lightweight version of Linux, which has only minimal packages installed, then you might need to install lsb-release, curl, gpg before running the above installation commands.
If you are running any lightweight version of Linux, which has only minimal packages installed, then you might need to install lsb-release, curl, gpg before running the above installation commands.
Use the command “sudo apt install lsb-release curl gpg” to install these packages.
After installation is complete, check the status of the Redis server-
sudo service redis-server statusIf it says – “redis-server is not running“, then start the server using the following command-
sudo service redis-server startTo automatically start the Redis server, when the system boots, use the following command-
sudo systemctl enable redis-serverWhen the server is running, then we can connect using the client. Type “redis-cli” in the terminal for that. Then we can type “ping“, and if we get back “PONG” that means everything is working fine.
redis-cli

# After connection it will look like below
127.0.0.1:6379>

# Then we can enter command ("ping" in this case)
127.0.0.1:6379> ping
PONGInstall Redis on MacOS
Redis can be installed easily on MacOS using Homebrew. So, before following the steps below, make sure that you have Homebrew installed.
Use the following command to install Redis-
brew install redisAfter installation, if you want to check if Redis is running or not, then use the following command-
brew services info redisTo start the Redis server use –
brew services start redisIn case you want to stop the Redis server for some reason, use the command below-
brew services stop redisThen we can use the Redis client to connect to the server. Use the command “redis-cli” to connect. Then we can enter “ping” and press enter, and if we get “PONG” back that means everything is working fine-
redis-cli

# After connection it will look like below
127.0.0.1:6379>

# Then we can enter command ("ping" in this case)
127.0.0.1:6379> ping
PONGInstall Redis on Windows
![]() Redis does not support Windows directly, so there is no installer available for Windows.
Redis does not support Windows directly, so there is no installer available for Windows.
One way to run Redis on Windows is using Docker (the installation process is described above).
Or we can use the Windows Subsystem for Linux(WSL) and install Redis on that system. Installation of Redis on Ubuntu(Linux) is described above, the same installation process can be used on the WSL system, for Ubuntu distribution.
Install Redis from Source Code
We can also install Redis from the source code. The installation process is very easy. Follow the steps below-
Get Source Code
We can get the code from git. Just clone the git repo-
![]() Redis GitHub repo link: https://github.com/redis/redis
Redis GitHub repo link: https://github.com/redis/redis
![]() Make sure you have git installed on the machine
Make sure you have git installed on the machine
# Clone source code from repository
git clone https://github.com/redis/redis.git

# Go to the source code directory
cd redisOr you can download the code. Use the following command to download(and extract) the source files.
# Download the source file of stable release
wget https://download.redis.io/redis-stable.tar.gz

# Extract the source file
tar -xzvf redis-stable.tar.gz

# Move to the source code directory
cd redis-stableOr you can download the source using your web browser from the page – https://redis.io/download/ and then extract using the above commands.
Run Installation
![]() Make sure you have “GCC” installed on the machine. If not then use the following command to install “GCC”-
Make sure you have “GCC” installed on the machine. If not then use the following command to install “GCC”-
# Run this if required
sudo apt install gcc![]() Make sure you have “make” tool installed on the machine. If not then use the following command to install “make”-
Make sure you have “make” tool installed on the machine. If not then use the following command to install “make”-
# Run this if required
sudo apt install makeNow we can run the main installation command. Use the following command to install Redis from source-
sudo make installOr if you want to enable “TLS” then we need to use the “BUILD_TLS=yes” like below-
![]() Make sure that you have OpenSSL Development libraries(like libssl-dev) installed on the machine.
Make sure that you have OpenSSL Development libraries(like libssl-dev) installed on the machine.
sudo make BUILD_TLS=yes installOn successful installation following output(or similar) will be generated-
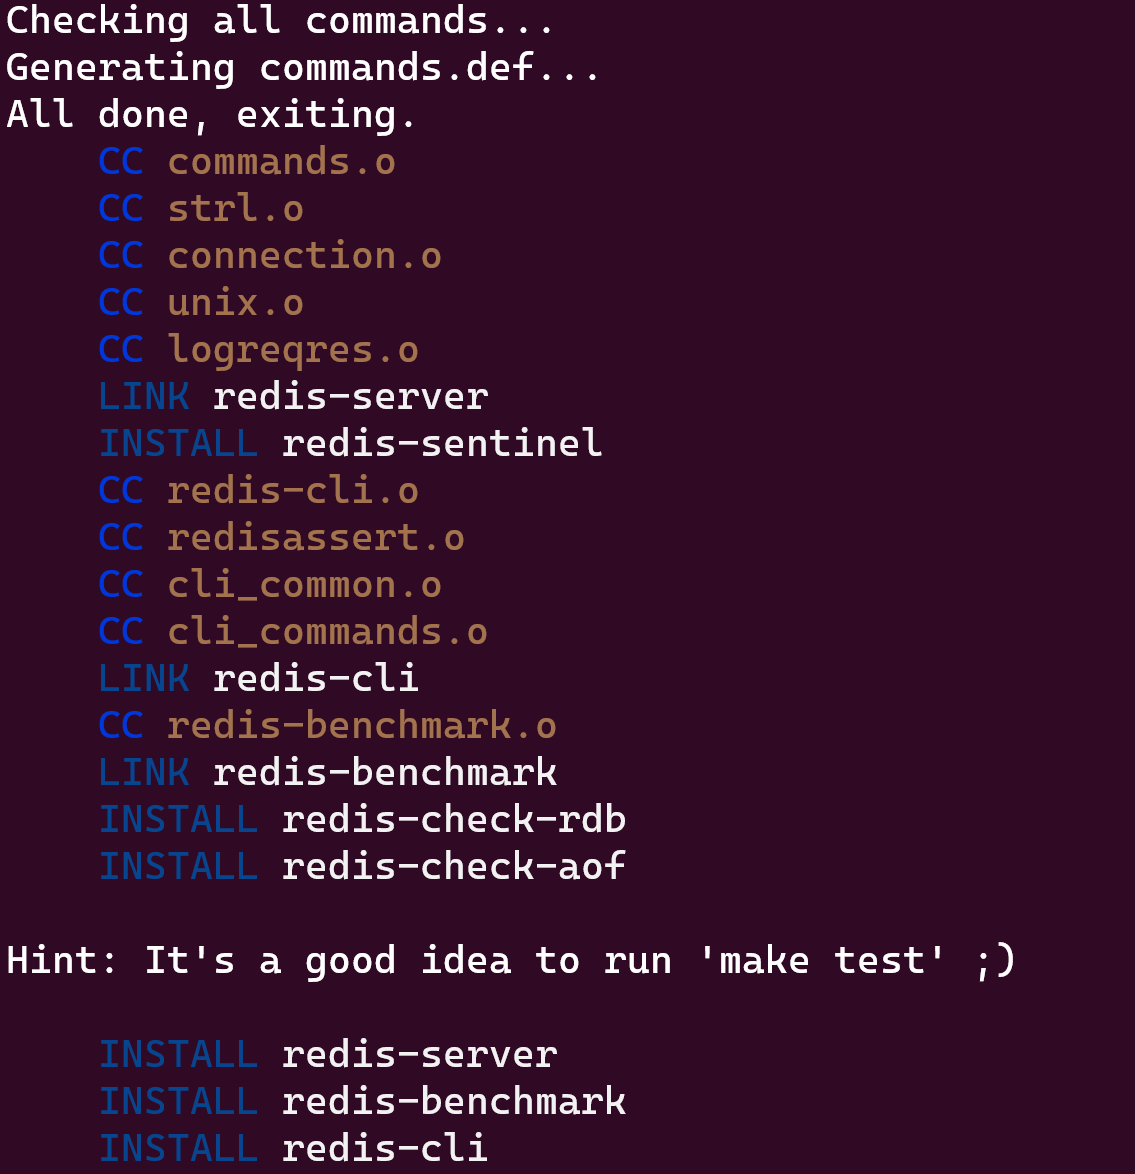
Now we can use the “redis-server” and “redis-cli” after successful installation.
Redis Server Information
To get Redis server information, connect to the Redis server using the “redis-cli” and then in the CLI use the command “info”.
127.0.0.1:6379> infoThat will give a long output like below-
# Server
redis_version:7.0.12
redis_git_sha1:00000000
redis_git_dirty:0
redis_build_id:bf86f713484a4108
redis_mode:standalone
os:Linux 5.10.16.3-microsoft-standard-WSL2 x86_64
arch_bits:64
monotonic_clock:POSIX clock_gettime
multiplexing_api:epoll
atomicvar_api:c11-builtin
gcc_version:12.2.0
process_id:1
process_supervised:no
run_id:cdda120a58ccbe86827614b281d1e89cb72aa458
tcp_port:6379
server_time_usec:1689643875919392
uptime_in_seconds:224547
uptime_in_days:2
hz:10
configured_hz:10
lru_clock:11922275
executable:/data/redis-server
config_file:
io_threads_active:0

# Clients
connected_clients:1
cluster_connections:0
maxclients:10000
client_recent_max_input_buffer:20480

# .
# .
# .
# .
# lot more information belowThere will be a long information list, which will contain information about-
- Server
- Client
- Memory
- Persistence
- Stats
- Replication
- CPU
- Modules
- Errorstats
- Cluster
- Keyspace
If we want to get information only one(or a few sections) then we can include the section(s) name after the “info” command. Like if we want to get the information only about the replication, then we can use –
127.0.0.1:6379> info replicationOutput will contain only the replication information-
# Replication
role:master
connected_slaves:0
master_failover_state:no-failover
master_replid:37e140c22f6175b77621b480e946a07037694739
master_replid2:0000000000000000000000000000000000000000
master_repl_offset:0
second_repl_offset:-1
repl_backlog_active:0
repl_backlog_size:1048576
repl_backlog_first_byte_offset:0
repl_backlog_histlen:0